Archive
Linux Server – Task 7: Optimization and Varnish
Course
Linux palvelimena [Linux server] by Tero Karvinen at Haaga-Helia University of Applied Sciences
Task
Measure the speed difference between a local computer WordPress page and a similar static page with the ‘ab’ tool. Install Varnish (an HTTP acceleration tool) – measure the performance of a dynamic web page before and after the installation to gain data about the possible improvements.
Testing environment
OS: Xubuntu Linux 13.10 “Saucy Salamander” 32-bit (persistent live USB drive)
System: HP EliteBook 2570p Notebook PC
Preparing the installation environment
LAMP and WordPress have been installed.
Web server performance
I began testing the performance with Apache’s own benchmarking tool, which I started by entering the following in the terminal emulator (in the command -c means the number of clients, and -n the sent number of requests):
$ ab -c 200 -n 300 http://localhost/~xubuntu/jannevaris.com/|grep -P ‘Failed|#/sec|50%|100%|Length’
The results were as follows:

The command prints an answer, where the size of the document, the number of failed requests, and the number of requests per second.
Next I ran the same command for one of my local WordPress page’s articles:
$ ab -c 200 -n 300 http://localhost/~xubuntu/jannevaris.com/?p=2/|grep -P ‘Failed|#/sec|50%|100%|Length’
The results were similar:

After this I tested a similar static page. First I created a new folder under the public_html folder named “statictest” with $ mkdir statictest. I created an index.html file in the folder with $ nano index.html, to which I copied the source code of my local WordPress’s front page. Then I saved the changes.
To finish the testing, I ran the same command for the static page:
$ ab -c 200 -n 300 http://localhost/~xubuntu/statictest/index.html/|grep -P ‘Failed|#/sec|50%|100%|Length’
The results showed that the page worked slightly faster when it was static:

Installing Varnish
I installed Varnish with $ sudo apt-get install varnish. After the installation I had to set Varnish to listen to port 80, so I navigated to /etc/default/ with $ cd /etc/default/, and edited the necessary file with $ sudoedit varnish, so that the Alternative 2 part looked like this:
## Alternative 2, Configuration with VCL
#
# Listen on port 6081, administration on localhost:6082, and forward to
# one content server selected by the vcl file, based on the request.
#
DAEMON_OPTS=”-a :80 \
-T localhost:6082 \
-f /etc/varnish/default.vcl \
-S /etc/varnish/secret \
-s malloc,256m”
Then I saved the changes. After this I edited Apache’s port settings by navigating to /etc/apache2/ with $ cd /etc/apache2/, and editing ports.conf with $ sudoedit ports.conf. On the “Listen” line, I changed the port to 8080 and saved the changes.
After this I restarted Apache and Varnish with $ sudo service apache2 restart and $ sudo service varnish restart.
Next I compared the results before and after installing Varnish. I ran the following commands again:
$ ab -c 200 -n 300 http://localhost/~xubuntu/jannevaris.com/|grep -P ‘Failed|#/sec|50%|100%|Length’
$ ab -c 200 -n 300 http://localhost/~xubuntu/jannevaris.com/?p=2/|grep -P ‘Failed|#/sec|50%|100%|Length’
The results show that the requests now happen faster, from which we can determine that the pages have better performance after installing Varnish.


YSlow and Firebug analysis and offered improvements
Yahoo!’s page performance tool YSlow graded the local WordPress front page as A, with an overall performance score of 92. The only features not graded A were:
Grade E on Use a Content Delivery Network (CDN)
There are 5 static components that are not on CDN.
You can specify CDN hostnames in your preferences. See YSlow FAQ for details.
Grade F on Add Expires headers
There are 6 static components without a far-future expiration date.
Firebug’s Net panel came up with no improvement suggestions.
References
WordPress Codex (http://codex.wordpress.org/)
Karvinen, Tero: Lessons 2014-3-10, Linux palvelimena [Linux server] (http://terokarvinen.com/2013/aikataulu-%E2%80%93-linux-palvelimena-ict4tn003-11-ja-12-kevaalla-2014)
About
This document can be copied and edited according to the GNU General Public License (version 3 or newer). http://www.gnu.org/licenses/gpl.html
Based on a course by Tero Karvinen, http://www.iki.fi/karvinen
Linux Server – Task 6: Installing WordPress Et Al.
Course
Linux palvelimena [Linux server] by Tero Karvinen at Haaga-Helia University of Applied Sciences
Task
Install WordPress on top of LAMP (installed previously). Modify the WordPress installation to include selected four customizations from the task list.
Testing environment
OS: Xubuntu Linux 13.10 “Saucy Salamander” 32-bit (persistent live USB drive)
System: HP EliteBook 2570p Notebook PC
Preparing the installation environment
I had already installed LAMP previously using my own instructions (in Finnish). I had also enabled Apache name-based virtual hosting, so I was able to use a www address locally for testing purposes, instead of just typing localhost/~xubuntu/ in the Firefox address bar.
Creating a database for WordPress
I began by logging into the MySQL server monitor by entering $ mysql -u root -p in the terminal emulator. I then created a new database for WordPress with the proper privileges by entering the following command in the terminal prompt:
CREATE DATABASE wpxubuntu;
GRANT ALL PRIVILEGES ON wpxubuntu.* TO wpxubuntu@localhost IDENTIFIED BY "password";
FLUSH PRIVILEGES;
After this I exited the MySQL monitor by typing exit and hitting enter.
Installing WordPress
First I navigated to my www home folder (see Apache name-based virtual hosting) folder by entering $ cd /home/xubuntu/public_html/jannevaris.com in the terminal. Next I downloaded the WordPress tarball with $ wget https://wordpress.org/latest.tar.gz.
I extracted the tarball with $ tar -xf latest.tar.gz, and moved the files in the now-present wordpress folder to the jannevaris.com folder with $ mv wordpress/* ../jannevaris.com/. I then deleted the obsolete wordpress folder and the tarball with $ rm -r wordpress and $ rm latest.tar.gz.
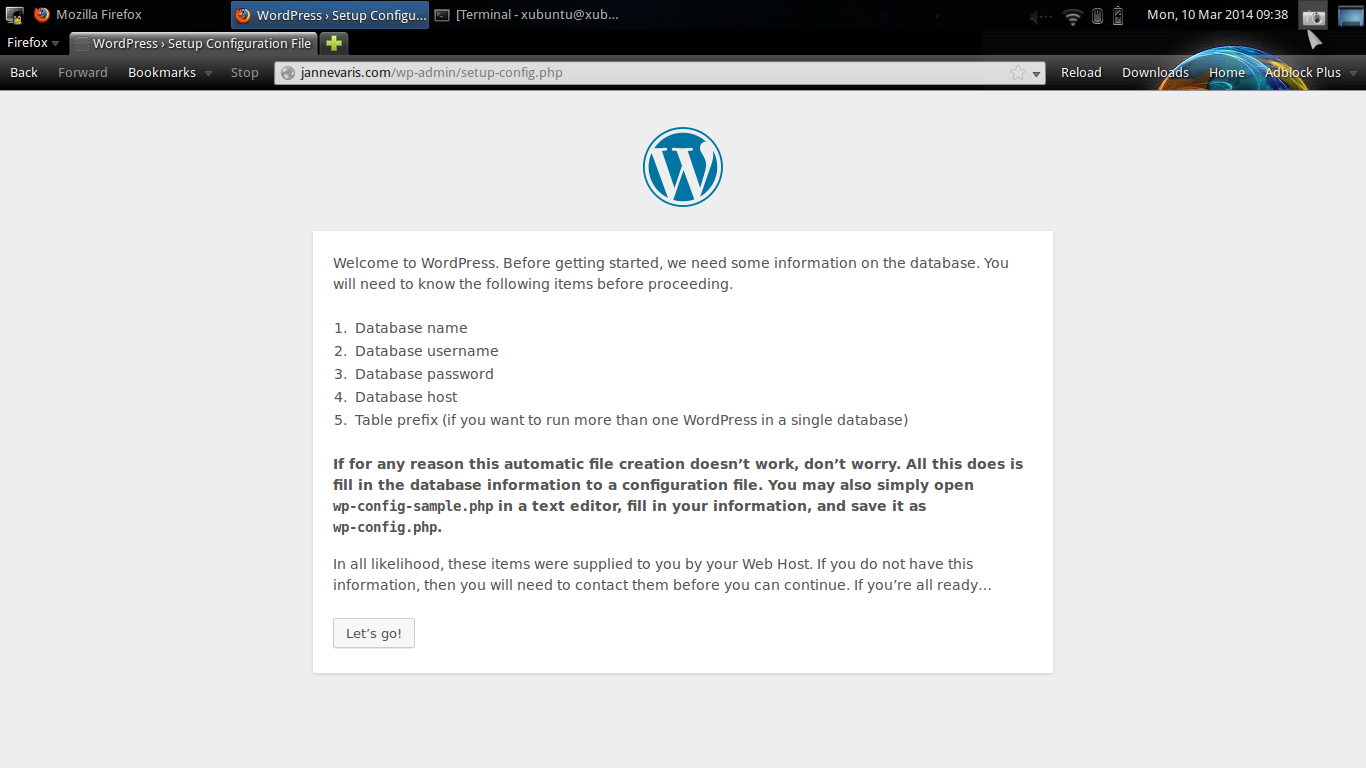
1. I navigated to jannevaris.com in Firefox, and was presented with a page about creating a configuration file:

2. I clicked “Create a Configuration File” to move forward. An instruction page was presented:
3. I clicked “Let’s go!” to move forward. A database connection details page was presented:

4. I filled in the details and clicked “Submit”. A prompt page followed:

5. I needed to create a WP config file, so I copied the code from the Firefox page and switched back to the terminal emulator, and ran $ ls in the jannevaris.com folder – no configuration file existed yet, apart from a sample named wp-config-sample.php, which I renamed in to wp-config.php by entering $ mv wp-config-sample.php wp-config.php in the terminal.
I opened the file for editing with $ nano wp-config.php and deleted all the existing code, after which I pasted the copied code in the file. I saved the changes and returned to the Firefox page, clicking “Run the install” to move forward.
6. An information-needed page was presented:

7. I filled in the details and clicked the “Install WordPress” button at the end of the page. Success!
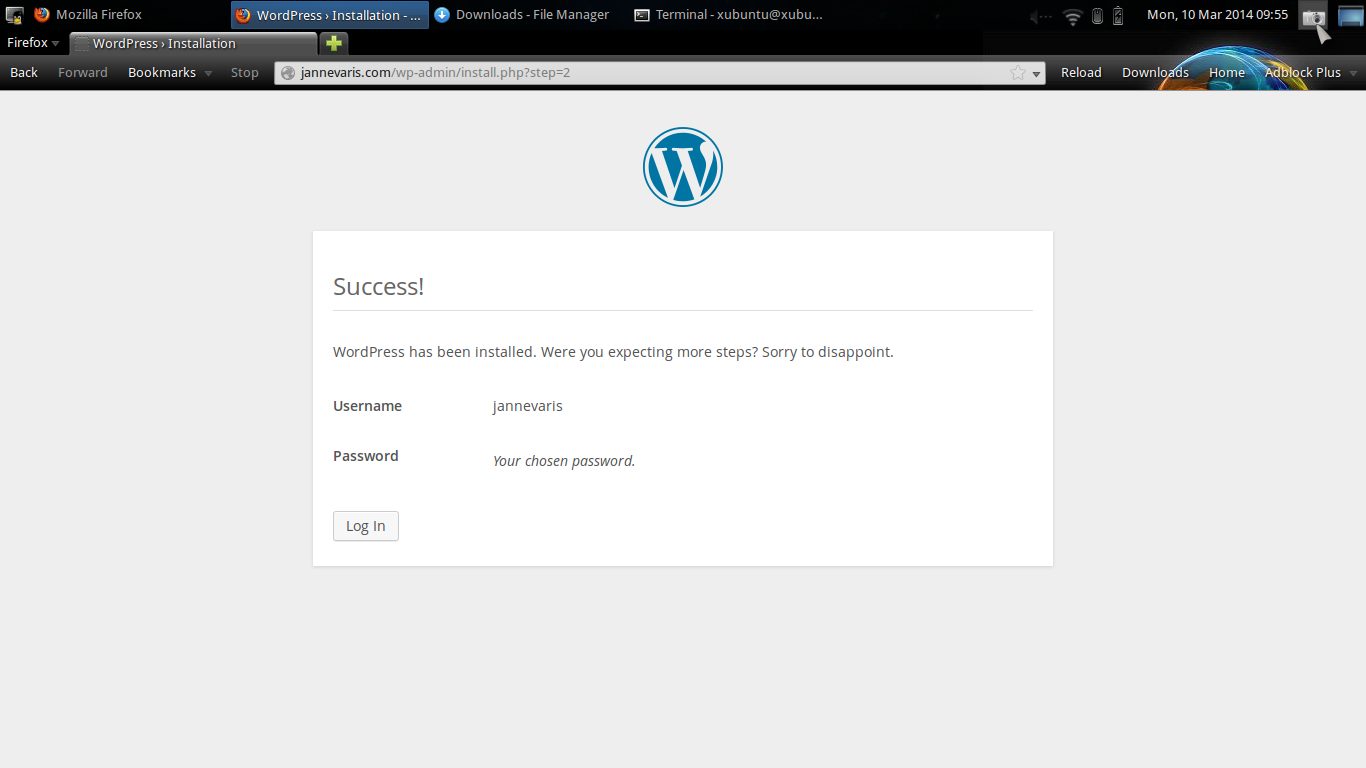
8. WordPress was now installed, and I could now move forwards to the login page:

9. Now I simply logged in and made a test post locally:

10. Task complete.
Enabling permalinks
First I navigated to Settings –> Permalinks in the local WP control panel, then I selected “Day and Name” and saved the changes. To complete the task, I still had to create a .htaccess file in the same folder as the rest of the WP files. I created the file with $ nano .htaccess, and added the code presented by WordPress in the Permalinks options:
<IfModule mod_rewrite.c>
RewriteEngine On
RewriteBase /
RewriteRule ^index\.php$ - [L]
RewriteCond %{REQUEST_FILENAME} !-f
RewriteCond %{REQUEST_FILENAME} !-d
RewriteRule . /index.php [L]
</IfModule>
Then I ran the following in the terminal:
$ sudo a2enmod rewrite
$ sudo service apache2 restart
After this the links worked correctly and looked cleaner, without any extra characters or markers.
Changing the theme
I navigated to the Appearance menu in the WP control panel and selected Themes. After this I changed the active theme to a theme named Twenty Twelve.
Enabling and adding images
Next I wanted to add images to my local WP test site, so I tried uploading one via Media –> Add New in the WordPress control panel. I received the following error:
“os_tux.png” has failed to upload due to an error
Unable to create directory wp-content/uploads/2014/03. Is its parent directory writable by the server?
Which meant that I didn’t have the necessary rights to the folder required the upload process. I fixed the issue by navigating to wp-content in the jannevaris.com folder by entering $ cd wp-content/ in the terminal, and then running $ mkdir uploads and $ chmod 777 uploads/. After this I was able to uploaded the images to my local WordPress installation without any problems, and also attach them to my test posts.
Backing up WordPress content
I made backups of the content via Tools –> Export in the WordPress control panel. Once in the Export menu, I selected “All Content” and then clicked the “Download Export File” button to download the backup file to local folder.
The file format is xml. This particular file was named janne039swordpresstest.wordpress.2014-03-10.xml.
References
WordPress Codex (http://codex.wordpress.org/)
Karvinen, Tero: Lessons 2014-3-3, Linux palvelimena [Linux server] (http://terokarvinen.com/2013/aikataulu-%E2%80%93-linux-palvelimena-ict4tn003-11-ja-12-kevaalla-2014)
About
This document can be copied and edited according to the GNU General Public License (version 3 or newer). http://www.gnu.org/licenses/gpl.html
Based on a course by Tero Karvinen, http://www.iki.fi/karvinen
Linux Server – Task 5: Apache Name-Based Virtual Hosting
Course
Linux palvelimena [Linux server] by Tero Karvinen at Haaga-Helia University of Applied Sciences
Task
Get name-based virtual hosting working with Apache. Try a virtual private server (VPS) – get it from Amazon, Linode, DigitalOcean, or another similar internet hosting service.
Testing environment
OS: Xubuntu Linux 13.10 “Saucy Salamander” 32-bit (persistent live USB drive)
System: HP EliteBook 2570p Notebook PC
Apache name-based virtual hosting test
I already had Apache (and LAMP) already installed, so I skipped that part this time (instructions on how to install LAMP (in Finnish)).
I had enabled and tested creating and navigating personal web pages with LAMP before (in English) as well, so I merely checked that they were still working by typing in localhost/~xubuntu/index.html in Firefox. Success.
I then created a folder named jannevaris.com in my public_html folder in my home directory, and moved the aforementioned index.html file in it with $ mv index.html jannevaris.com. I navigated to /etc/apache2/sites-available by typing $ cd /etc/apache2/sites-available in the terminal, and created a new config file there with $ sudoedit jannevaris.conf. I added the following lines to the file and saved the changes:
<VirtualHost *:80>
    ServerName www.jannevaris.com
    ServerAlias jannevaris.com
    DocumentRoot /home/xubuntu/public_html/jannevaris.com
</VirtualHost>
After this I enabled the site by entering $ sudo a2ensite jannevaris.conf, and restarted the Apache daemon with $ sudo service apache2 reload. Next I navigated to /etc via $ cd /etc, and edited the hosts file with $ sudoedit hosts. I added my computer’s ip address alongside the desired virtual hosting addresses defined earlier:
127.0.0.1 localhost
127.0.1.1 xubuntu
my-ip www.jannevaris.com
my-ip jannevaris.com

# The following lines are desirable for IPv6 capable hosts
::1 ip6-localhost ip6-loopback
fe00::0 ip6-localnet
ff00::0 ip6-mcastprefix
ff02::1 ip6-allnodes
ff02::2 ip6-allrouters
ff02::3 ip6-allhosts
After this I tested the changes by entering jannevaris.com in Firefox, and the previously mentioned index.html successfully loaded.
References
VirtualHost Examples (http://httpd.apache.org/docs/2.2/vhosts/examples.html)
Karvinen, Tero: Lessons 2014-2-24, Linux palvelimena [Linux server] (http://terokarvinen.com/2013/aikataulu-%E2%80%93-linux-palvelimena-ict4tn003-11-ja-12-kevaalla-2014)
About
This document can be copied and edited according to the GNU General Public License (version 3 or newer). http://www.gnu.org/licenses/gpl.html
Based on a course by Tero Karvinen, http://www.iki.fi/karvinen
Linux Server – Task 2: Stress Testing and Logs
Course
Linux palvelimena [Linux server] by Tero Karvinen at Haaga-Helia University of Applied Sciences
Task
Collect system load data with Munin. Analyze the generated Munin graphs. Use Stress to increase the system load. Cause a few events to be logged in a system log, and analyze 2-3 lines.
Testing environment
OS: Xubuntu Linux 13.10 “Saucy Salamander” 32-bit (persistent live USB drive)
System: HP EliteBook 2570p Notebook PC
Installing Munin
I installed Munin by entering $ sudo apt-get update and $ sudo apt-get install munin in the terminal.
The graphs
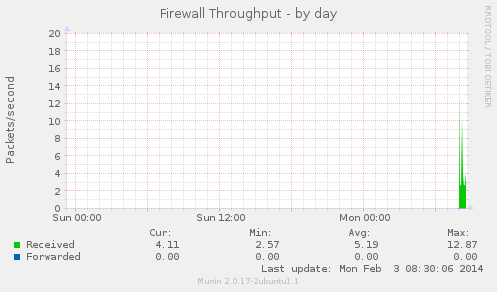
The graphs were obtained by navigating to file:///var/cache/munin/www/ in Firefox, which opens the directory containing them in the browser. The directory (and graphs) can be updated by hitting refresh or F5. Below are some graphs showing what data Munin has collected since its installation, which at this point isn’t very much for obvious reasons.
Munin requires a decent amount of time to gather enough data for a useful analysis, which for this report was impractical due to time constraints and a live USB drive being used, but it’s certainly very useful for monitoring the system load in the long term, separating the various categories for easy viewing.


Installing Stress and htop
I installed Stress and htop by entering $ sudo apt-get update, $ sudo apt-get install stress -y and $ sudo apt-get install htop in the terminal. Htop is an interactive process viewer for Linux.
Running Stress and htop
I ran Stress with $ stress –cpu 8 –io 4 –vm 2 –vm-bytes 128M –timeout 120s, which stresses the system. This command and others can be viewed in the example by typing $ stress in the terminal. I set the timeout to two minutes for my test, but you can run it without one, and simply end the stress test with ctrl+c.
After the test was underway, I ran htop with $ htop. You can also use $ top, if you don’t want to install htop. You can exit htop with ctrl+c. The following is a screenshot of htop running in the terminal while the stress test was active, showing CPU, memory etc. usage by users, as well as total tasks and running tasks (15).

Once the stress test was complete, the following lines were displayed:
stress: info: [15223] dispatching hogs: 8 cpu, 4 io, 2 vm, 0 hdd
stress: info: [15223] successful run completed in 123s
Analyzing logs
To get some events logged, I began by first failing to provide a password for my user account when trying to log in via SSH, and then successfully logged in with the same account via SSH, generating log lines to analyze in /var/log/auth.log. I opened the last ten lines of the log by entering $ tail -f auth.log in the terminal.
Feb 2 10:21:20 xubuntu sshd[24874]: Failed password for xubuntu from 127.0.0.1 port 60038 ssh2
Above: an unsuccessful login via SSH. From the left: date and time (local time), server name, SSH Daemon (listens to user connections), message about login failure and reason, user’s IP address and ephemeral port, which is used in client-server connection at the client end when connecting to a well known port on a server (SSH uses port 22). Finally, there’s the SSH protocol version number.
Feb 2 10:21:28 xubuntu sshd[24878]: Accepted password for xubuntu from 127.0.0.1 port 60040 ssh2
Feb 2 10:26:49 xubuntu sshd[25513]: pam_unix(sshd:session): session opened for user xubuntu by (uid=0)
Above: successful login via SSH. First line, from the left: date and time (local time), server name, SSH Daemon (listens to user connections), message about login success, user’s IP address and ephemeral port, which is used in client-server connection at the client end when connecting to a well known port on a server (SSH uses port 22), SSH protocol version number.
Second line, from the left: date and time (local time), server name, SSH Daemon (listens to user connections), pam_unix authentication module for this session (retrieves user account details / authentication from the system), and a message about the session being opened for the user. The uid=0 refers to the fact that the user is temporarily 0, when the session is being opened and the user is switched.
References
htop (http://hisham.hm/htop/)
Munin (http://munin-monitoring.org/)
Karvinen, Tero: Lessons 2014-1-27, Linux palvelimena [Linux server] (http://terokarvinen.com/2013/aikataulu-%E2%80%93-linux-palvelimena-ict4tn003-11-ja-12-kevaalla-2014)
About
This document can be copied and edited according to the GNU General Public License (version 3 or newer). http://www.gnu.org/licenses/gpl.html
Based on a course by Tero Karvinen, http://www.iki.fi/karvinen
Linux Server – Task 1: Complete One Course Exam
Course
Linux palvelimena [Linux server] by Tero Karvinen at Haaga-Helia University of Applied Sciences
Task
Complete an archived Työasemat ja tietoverkot [workstations and networks] course exam. I chose this one (in Finnish).
Testing environment
OS: Xubuntu Linux 13.10 “Saucy Salamander” 32-bit (persistent live USB drive)
System: HP EliteBook 2570p Notebook PC
Creating the user accounts
After booting to the desktop, I opened the terminal prompt (super key + t). I had previously set the keyboard layout to Finnish, but I could have changed it manually by executing $ setxkbmap fi in the terminal. Next I created user accounts for the users mentioned in the exam by running $ sudo adduser “user name” in the terminal, making sure to create each person an identifiable user name and a secure password.
Installing Apache and OpenSSH
I ran $ sudo apt-get update in the terminal to update the package list, and then installed Apache server and OpenSSH via the terminal by running $ sudo apt-get install apache2 openssh-server.
Testing Apache
I created a folder named public_html for testing purposes in my home directory by running $ mkdir public_html in the terminal. I then created an index.html file in the same folder with $ nano index.html, and added the following lines to it in order to create a valid HTML5 test page:
<!doctype html>
<html>
<head>
	<title>Test</title>
</head>
<body>
	<p>Hello World!</p>
</body>
</html>
I enabled the Apache2 Userdir Module by running $ sudo a2enmod userdir in the terminal. “Apache2 userdir module is used to create a webroot in the user’s home directory. By using userdir module each user that is in the system will have the Apache2 root directory with the folder name public_html in the home directory” (Ubuntu Server Guide).
Next I restarted the apache2 daemon via $ sudo service apache2 restart. Having completed this, I tested the HTML5 page in Firefox at localhost/~username/, which returned a page with the line “Hello World!”, verifying that the everything was working as intended.
Testing SSH and user home pages
To test SSH and creating home pages for users, I logged in as one of the users (pekkawinha) via SSH by entering $ ssh pekkawinha@localhost in the terminal, and then accepted the host’s authenticity and entered the password for Pekka Winha. Doing so was OK in this case because none of the users had yet been given their passwords, and thus couldn’t have logged in yet.
At this point I repeated the procedure for creating a public_html folder and index.html file (without sudo, as the user isn’t root), this time in pekkawinha’s home directory (/home/pekkawinha/public_html/index.html).
Creating the files while logged in as the user will give the user the permissions necessary to edit the files later, when they log in for the first time. I tested the page in Firefox (the same method as before), and found that everything was working as intended. I terminated the SSH connection with $ exit and returned to my own account.
Installing MySQL and phpMyAdmin
I installed MySQL and phpMyAdmin by entering $ sudo apt-get install mysql-server phpmyadmin in the console. Following my own LAMP installation instructions (in Finnish), I set the root password and selected the correct configuration options. The database for phpMyAdmin was configured with dbconfig-common. I navigated to localhost/phpmyadmin/ in Firefox and was greeted by a login prompt – the root user login details worked, as expected.
Enabling PHP for user directories
Next I needed enable PHP for the user directories. This was accomplished by entering $ sudo nano /etc/apache2/mods-available/php5.conf in the terminal, and editing the php5.conf, which in this case simply meant commenting out the last five lines of the file. Then I restarted the apache2 daemon with $ sudo service apache2 restart.
I logged in as pekkawinha via SSH again to verify that PHP was indeed working. I created a new file in public_html with $ nano index.php, and added the following lines:
<?php
print(37.4+4.4)
?>
After this I navigated to localhost/~pekkawinha/index.php in Firefox, and the result to my query was printed: 41.8. This verified that PHP was working properly. Finally, I used $ exit to terminate the SSH connection.
Creating a global mystatus shell script
The final piece to the puzzle was creating a global shell script named mystatus. I began by creating a new file in my home directory with $ nano mystatus. I added the following lines to it for showing a computer’s disk space and IP address. Since I’m using a live USB drive, I used ifconfig to cover all my bases, but you can use something like ip addr show wlan0 if you only use one computer.
#!/bin/sh
df -h
ifconfig
Next I gave the mystatus script the necessary permissions to run it by running $ chmod a+x mystatus in the terminal. Then I tested the script via $ ./mystatus. It worked as expected. Finally, I ran $ sudo mv mystatus /usr/local/bin to move the mystatus script, so that it was globally available to all users by simply entering $ mystatus in the terminal.
References
Linux Live USB Creator (http://www.linuxliveusb.com/)
Ubuntu Server Guide (http://ubuntuserverguide.com/2012/10/how-to-enable-and-configure-apache2-userdir-module-in-ubuntu-server-12-04.html)
Karvinen, Tero: Lessons 2014-1-24, Linux palvelimena [Linux server] (http://terokarvinen.com/2013/aikataulu-%E2%80%93-linux-palvelimena-ict4tn003-11-ja-12-kevaalla-2014)
About
This document can be copied and edited according to the GNU General Public License (version 3 or newer). http://www.gnu.org/licenses/gpl.html
Based on a course by Tero Karvinen, http://www.iki.fi/karvinen
Task 1 – Android Mobile Dev Tools & Hello World with Cordova
Operating system
Xubuntu Linux 13.04, 32-bit
Tools
Firefox
Xubuntu terminal
Eclipse (http://www.eclipse.org/)
PhoneGap (http://phonegap.com/)
Android SDK (http://developer.android.com/sdk/)
Installing Eclipse and the Android Software Development Kit
After booting into Xubuntu, I installed Eclipse via the Ubuntu Software center. I booted Eclipse and accepted the default workspace, and then clicked “Install New Software” under the Help menu. Clicking “Add” gave me an option to add a repository by providing a hyperlink, which in this case was https://dl-ssl.google.com/android/eclipse/ for the Android plugin. After pressing enter, I checked the “Developer tools” option and clicked next twice, and accepted the license agreement. Installation proceeded until I received a security warning about installing unsigned content, but in this case I ignored it and continued with the installation. When the process finished, I was prompted to restart Eclipse.
After Eclipse was restarted, a wizard for installing the Android software development kit (from now on referred to as SDK) opened. I deselected the option to install the latest Android APIs, and instead opted to install version 2.2, and clicked next. I declined to send usage statistics to Google, clicked finish and accepted the license agreements. Installation finished.
Bug fixing
To prevent a known bug “R cannot be resolved” in Eclipse when compiling Hello Android, I ran $ ./android-sdks/tools/android in the terminal to open the Android SDK manager and install the four packages under “Tools”.
Creating a new project post-bug fixing
I created a new Eclipse Android project via File (menu)/New Project/Android/Android Application Project, named Hello Android, using the all the default settings. Note: I had to manually set the Theme option to “none” before being able to move forward after naming the project. I also installed the needed support libraries during the creation the project (Install Dependencies page). I opened the MainActivity.java (HelloAndroid/src/MainActivity.java) and confirmed that the “R cannot be resolved” bug was fixed.
Running a project in the Android emulator
I opened the MainActivity.java by double-clicking it, and with its tab selected, I then ran the project via Run (menu)/Run/Android Application. After prompted, I added a new Android Virtual Device – I had “Launch a new Android Virtual Device” selected, then added the device via manager/New, and entered the details… AVD Name: api8, Device: Nexus 4, Target Android 2.2 – API Level 8. I then clicked “Start” and “Launch” to boot it.
However, I received an error about missing a file named “libgl.so”. After some reading at Stack Overflow, I determined that this can be fixed via the terminal by installing libgll-mesa-dev: $ sudo apt-get install libgl1-mesa-dev. After this I ran the MainActivity.java again, and the emulator showed a white screen with the “Hello Android” message.
Hello PhoneGap (Cordova)!
I created a new project in the same way as above, named “Janne Runs Cordova”. Then I entered the following commands in the terminal to create an assets folder for html files:
$ cd; cd “workspace/JanneRunsCordova/”
$ mkdir assets/www/
Next I downloaded PhoneGap, which is a distribution of Apache Cordova, by entering the following commands in the terminal:
$ wget https://github.com/phonegap/phonegap/zipball/2.1.0
$ unzip 2.1.0
$ rm 2.1.0
$ cp -i phonegap*/lib/android/cordova*.jar libs/
$ cp -i phonegap*/lib/android/cordova*.js assets/www/
$ cp -ri phonegap*/lib/android/xml/ res/
$ rm -r phonegap-phonegap*/
I refreshed the project panel in Eclipse (F5) to show libs/cordova-2.1.0.jar, after which I right-clicked the .jar file and selected “Configure Build Path”. In the Libraries tab I clicked “Add JARs”, JanneRunsCordova/libs/cordova-2.1.0.jar. Ok. Then I edited my MainActivity.java so that it looked like this (Cordova import, extends DroidGap, super.loadUrl..):

I edited AndroidManifest.xml (JanneRunsCordova/res/AndroidManifest.xml) to include the uses-permissions from the PhoneGap API documentation (http://goo.gl/NCeWo) via the Android Common XML Editor within Eclipse (Open With..). After this was done, I added a new html file named index.html in assets/www by right-clicking the www folder and doing the following: New/File/index.html. Then I edited the index.html file to include the Cordova API device index.html code (http://goo.gl/NSKEJO).
Finally I navigated to Window (menu)/Preferences/Android/LogCat, where I checked the monitoring and show logcat view if message priority is at least “ERROR”. Then I opened the MainActivity.java, and ran it (Run/Run/Android Application). The following data was presented on a white screen:
Device Name: sdk
Device Cordova: 2.1.0
Device Platform Android
Device UUID: 9774d56d682e549c
Device Version: 2.2
Task complete. The development environment is now confirmed to be up and running.
References
PhoneGap API (http://docs.phonegap.com)
Karvinen, Tero: Lessons 2013-08-29, Mobiilituotekehitys [Mobile Application Development] (http://terokarvinen.com/2013/aikataulu-%E2%80%93-mobiilituotekehitys-bus4tn008-3-syksylla-2013)
About
This document can be copied and edited according to the GNU General Public License (version 3 or newer). http://www.gnu.org/licenses/gpl.html
Based on a course by Tero Karvinen, http://www.iki.fi/karvinen
